5-Minute Workspace Reset Checklist (Printable + Digital)

Workspace Reset Checklist: A Printable Routine for Decluttering, Focus, and a Fresh Start
A workspace reset is a short, repeatable routine that clears visual noise, restores order, and makes it easier to start the next task without friction. Instead of waiting for a “big clean,” a reset gives you a dependable baseline: clear surfaces, the right tools within reach, and one simple note that tells you what to do next. Below is a practical reset method you can use in a few minutes, plus a printable checklist you can keep at your desk for daily or weekly use.
What a workspace reset is (and why it works)
A workspace reset is a quick return to “ready-to-work” condition: clear surfaces, tools in home locations, and a simple plan for the next session. When a desk gets cluttered, it quietly adds extra decisions—Where did that cable go? Which paper matters? What should happen first?—and those decisions can slow task initiation and chip away at focus.
A consistent reset routine reduces repeated searching, prevents pileups, and makes deep work easier to start because your environment stops fighting your attention. The goal isn’t perfection or a photo-ready desk; it’s a reliable baseline that supports work, study, and creative projects. If you want ergonomics to support that baseline, NIOSH and Cornell both provide clear workstation guidance you can reference while you reset: NIOSH ergonomics resources and Cornell University ergonomics.
Set up for success: tools and a 5-minute start
Resets are easiest when the supplies are already nearby. Keep a small “reset kit” within arm’s reach: a trash bag, microfiber cloth, an all-purpose wipe, a pen cup, and a small catchall tray. Then choose one “home” for each category—writing tools, charging cables, papers to file, and frequently used devices—so your brain doesn’t have to invent a new system each time.
Use a timer (5–15 minutes) to prevent overthinking and to keep the routine light enough to repeat. Finally, create a single intake spot for new items (a tray or inbox) so the desktop stays clear during the day even when life gets busy.
Quick reset supplies and what they’re for
| Item | Purpose | Where it should live |
|---|---|---|
| Catchall tray | Temporary landing spot for small items | Front corner of desk |
| Inbox folder | Holds papers that need filing or action | Vertical file or top drawer |
| Cable tie/clip | Prevents cord sprawl | Back edge of desk |
| Wipe + cloth | Fast cleanup of dust and smudges | Bottom drawer or nearby cabinet |
| Label or sticky notes | Simple categorizing while sorting | Pen cup or drawer organizer |
The 3-pass reset: clear, categorize, restore
When your desk is messy, it’s tempting to start “organizing” immediately—moving items around without actually reducing the pile. A reset works better when it happens in simple passes that keep momentum.
Pass 1 — Clear
Remove trash, cups, packaging, and anything that doesn’t belong in the workspace. This is the fast win that makes everything else easier. If something belongs in another room, don’t stash it in a drawer “for now”—put it in a relocation pile so it actually leaves the desk.
Pass 2 — Categorize
Group what remains into a few buckets: action today, action later, reference, supplies, and relocate. Keep the categories broad; the goal is to reduce decision-making, not create a complex filing system mid-reset.
Pass 3 — Restore
Return each bucket to its “home” (inbox, shelf, drawer, bag) and leave only current tools on the surface. If an item has no home, create one immediately—a labeled folder, a small bin, or a single drawer section—so it doesn’t become tomorrow’s clutter.
Paper, digital, and cable clutter: a simple system that sticks
- Paper: Keep only one active stack. Everything else goes into one inbox folder to process during a scheduled weekly reset. A three-folder approach works well: “To Do,” “To File,” and “To Shred/Recycle.”
- Digital: End each reset by closing unused tabs and applications, naming the working file clearly, and saving it in the correct folder. Digital clutter can raise stress levels and mental load too—APA’s overview of how stress affects the body is a helpful reminder to keep routines supportive and sustainable: American Psychological Association.
- Cables: Assign one charging station and label chargers if multiple devices share similar cords. Use clips to route essentials along the desk edge so cords don’t creep back into your work zone.
Make it a ritual: daily mini-reset and weekly deep reset
Daily mini-reset (3–7 minutes)
Weekly deep reset (20–40 minutes)
Printable checklist: how to use the digital download
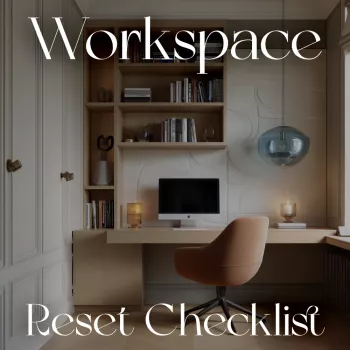
If you want the steps laid out in one place, use the Workspace Reset Checklist printable digital download as your routine anchor. Print one copy for the desk and keep a second copy in a binder or clipboard for weekly resets.
If your day includes travel or lifestyle projects too, a couple of other digital downloads can be handy companions for staying organized: No-Nausea Ride digital guide and Smart Thrift strategic guide.
FAQ
How long should a workspace reset take?
Most daily resets take about 5–15 minutes, and a weekly reset usually fits into 20–40 minutes. Using a timer keeps the routine from expanding and makes consistency easier than chasing perfection.
What if the desk gets messy again within a day?
A working mess is normal; the issue is accumulation with no “intake” system. Use one catchall tray or paper inbox for incoming items, and add a 2-minute mid-day reset on high-traffic days to prevent pileups.
Should the checklist be printed or used digitally?
Printed checklists are faster to glance at and keep visible at the point of use, while digital checklists are great if you always have a tablet or phone nearby. Try both for a week and stick with the format you actually use consistently.














Leave a comment